| Welcome to my blog!

Meet the Author

Roshan is an undergarduate student in Information and Communication Technologies from Vavuniya Campus of the University of Jaffna.He is very much interesting on IT related Topics and the technical stuffs.Roshan is also a creative mind with lots of ideas and potential writter..!

Subscribe to this blog!

Receive the latest posts by email. Just enter your email below if you want to subscribe!

Tuesday, January 6, 2015

How we easily check/edit CSS Attributes/Structure of a Web Site!


Interface in Firefox Browser
Select the are and click inspect element

Use your Browser.

Almost every  browser provide this feature.Still if you need more advanced features you can use an Extension like Firebug. All you need to do is selecting the area you want to check and right click and select inspect element from the menu you get! you may come with following interfaces like follows!


Interface in Chrome.

Use this to Web Development 

There you can check the site style settings and structure when you go through the codes!.This tool comes handy when you are a developer and you need to edit and style your site you can check your site from here and you can apply your codes here or change the values on CSS attributes and check how will it affect your site.without editing your source and after check the appropriate settings you can add the code/changed values to the original source!

Use it in learning purpose 

And this also comes handy when you want to study the structure of a other site and see what are the setting or attributes they have used to style their pages.Why not use this and learn some CSS  tags! :)

Some Extra Info!

Also here i should mention this. if you are maintaining a site or if you are a developer of your own site lets say,in your original code you have used some external style sheets or links for Java Script functions or Google APIs (Ex::In your blogger theme you may have used Bootstrap in your site),In this browser window it will show you the basic structure and you can change attributes and check but you may not find the place in you code that's because the particular part and CSS  setting is externally linked to your site.So in this case you may do custom styling by putting style tags in your site script or doing CSS injection or pass parameters to the JavaScript function this will depend on the source you use. 
rkarunarathna Web Developer,Programer

Roshan is an undergarduate student in Information and Communication Technologies from Vavuniya Campus of the University of Jaffna.He is very much interesting on IT related Topics and the technical stuffs.Roshan is also a creative mind with lots of ideas and potential writter..!

Monday, January 5, 2015

Web Browser එක හාවිකා කර CSS Settings හදමු.!


Firefox Browser එකේ දිස්වන අයුරු
අවශ්‍ය area එක select කරලා  inspect element තෝරන්න

Browser එක භාවිතයෙන්..!

හැම  browser එකක්ම වාගේ මේ feature එක සපයනවා. තවත්  advance features ඔන නම් අපිට  Firebug වගේ Extension එකක් භාවිතා කරන්න පුලුවන් ඒත් මම කියන වැඩේට එච්චර සංකීර්ණ සූදානමක් ඕන නැහැ. කරන්න තියෙන්නේ මෙච්චරයි අවශ්‍ය area එක  ලගට මවුස් එක අරන් ගිහින්  right click කරලා inspect element තෝරන්න එවිට පහත පරිදි interfaces දකින්න ලැබේවි. 

Chrome Browser එකේ දිස්වෙන අයුරු

Web Development සදහා මෙම ක්‍රමය භාවිතය.

ඔබට පුලුවන් මේ ලැබෙන මුහුණතින් ඔබේ HTML කෝඩ් එක පරික්ෂා කරන්න .ඔබ වෙබ් අඩවි නිර්මාණකරුවෙක් නම් මේ පහසුකම ඔබේ වෙබ් අඩවියේ අවශ්‍ය කරන සැකසුම් පරික්ෂා කිරීමට යොදාගන්න පුලුවනි.මේහිදී ඔබේ  source කොඩ්  එක වෙනස් නොකර අවශය කරන සැකසුම් පරික්ෂා කරලා බලන්න පුලුවන් .පසුව වඩාත් ගැලපෙන සැකසුම් ඔබේ  source කෝඩ් එකට ඇතුලත් කරන්න.

ඉගෙනීම සඳහා භාවිතා කරමු.

ඔබට මෙම ක්‍රමය පාවිච්චි කරලා එදිනෙදා ඔබ යන වෙබ් අඩවි වල පාවිච්චි කරලා තියෙන CSS tags බලන්න පුලුවන්  :). ඉතින් මෙ ක්‍රමයෙන් සයිට් එකක පාවිච්චි කරලා තියෙන මේ ටැග්ස් ගැන ඒවායේ තියෙන සැකසුම් ගැන ඉගෙන ගන්න පුලුවන් නේද?.

තවත් තොරතුරක් !

මේ ක්‍රමය පාවිච්චි කරන කෙනෙක්ට මේ වගේ ප්‍රශ්නයක් එන්න පුලුවනි.අපි Browser එකේ මේ වෙනස්කම් කරලා ඒක අපේ මූලික කේතයේ හෙව්වම එතන ඔයාට හොයාගන්න බැරිවෙයි ඒකට හේතුව ඒ අදාල කරන සැකසුම් තියෙන්නේ ඔයාගේ කෝඩ් එකේ නෙවෙයි.ඔයා refer කරලා තියෙන වෙනත් තැනක මෙතනදි ක්‍රම දෙකක් තියෙනවා එකක් ඔයාගේ කොඩ්/ස්ක්‍රිප්ට් එකේ මේ සඳහා වෙනම සැකසුම් ඇතුලත් කල හැකියි.(මේ සඳහා CSS දැනුම තියෙනවා කියලා මම හිතනවා හම්ම් පුලුවන් වුනොත් පෝස්ට් එකක් දාන්නම්!) එහෙම නැතිනම් ඒ අදාල සැකසුම් ඒතැනට යවන කුමයක් තියෙනවා.ඒක හැබැයි ඔයා refer කරන තැන අනුව වෙනස් වෙනවා.මේක හරියට අපි parameters පාස් කරනවා වගේ වැඩක් ඒ අදාල function එකට. 
rkarunarathna Web Developer,Programer

Roshan is an undergarduate student in Information and Communication Technologies from Vavuniya Campus of the University of Jaffna.He is very much interesting on IT related Topics and the technical stuffs.Roshan is also a creative mind with lots of ideas and potential writter..!

Sunday, January 4, 2015

Google Chrome theme එකක් ලේසියෙන් හදමුද?


මේක ඇත්තටම ගොඩක්ම ලේසි වැඩක් කරන්න තියෙන්නේ ගුගල් දෙන ඇප් එකක් පාවිච්චි කරන්න විතරයි! මේ වගේ ලොඩක් themes බලන්න ඕන නම් Google’s Chrome Web Store එකේ  themes for Chrome යන්න.එතැන ගොඩක් themes තියෙනවා ඔයාට පාවිච්චි කරන්න පුලුවන්! හරි අපි දැන් අපේම එකක් හදන්නනේ යන්නේ වැඩේ පටන් ගමු!

මුලින්ම මොකද්ද??

මුලින්ම ගිහින් මේ ඇප් එක ගන්න My Chrome Theme app දැන් ඒක ස්ථාපනය(install) කරගන්න.දැන් ඔයාගේ බ්‍රවුසර් එකේ ඇප්ස් අතර මේ ඇප් එකත් පෙන්නාවි.ඒ ඇප් එක click කරන්න පහත වගේ වින්ඩෝ එකක් ඔයාට ලැබේවි. දැන් ඉතින් හරිම ලේසියි එකේ පිලිවලටම යන්න.ඊ තලත් දාලවේ තියෙන්නේ buttons වල.


Image එකක් තොරාගැනීම.

මේ සඳහා ඔයාට ඕනෑම ඔයා කැමති රූපයක් හරි ඔයාම නිර්මාණය කරගත්ත රූපයක් යොදාගන්න පුලුවන්!නැත්නම් වෙබ් කැමරාවෙන් රූපයක් ගන්නත් පහසුකම තියෙනවා.


මේ ඇප් එක පාවිච්චි කරලා ඔයා upload කල පින්තූරයට වෙනස්කම් කරන්නත් පුලුවන්.පින්තූරයට effects යොදන්න,size එක හදාගන්නත් පුලුවන්. දැන් ඊලගට...


වර්ණ යොදමු

මෙතනදී ඔයාට අවශ්‍ය පාට යොදන්න පුලුවන් ඔයා ගත්ත රූපෙට ගැලපෙන්න පාට යොදන්න පුලුවනි.මෙතන ඔයාට ඒ ඒ tab වලට වෙන වෙනම පාට තෝරන්න පහසුකම තියෙනවා.නැත්නම් Google ගේ  i am feeling lucky option එකත් තියෙනවා ඒ කියන්නේ ඇප් එකෙන් ඔයාගේ රූපයට ගැලපෙන පාට තෝරලා දෙනවා.


Theme එක ස්ථාපනය කිරීම සහ share කිරීම

වැඩ ඉවරනම් ඊළඟ step එකේදි ඔයාට දකින්න ලැබේවි මේ theme එකට නමක් දෙන්න කියලා පනිවිඩයක් ඊට පස්සේ භාගත කරගන්න හරි share කරන්න හරි theme එක ස්ථාපනය කරගැනීමේ හරි පහසුකම තියෙනවා.share කරනකොට ඔයාට හම්බෙන link එක හැමෝටම share කරන්න තමා ඉතින් තියෙන්නේ.


rkarunarathna Web Developer,Programer

Roshan is an undergarduate student in Information and Communication Technologies from Vavuniya Campus of the University of Jaffna.He is very much interesting on IT related Topics and the technical stuffs.Roshan is also a creative mind with lots of ideas and potential writter..!

How to create your own theme for Google Chrome Web Browser


Its really easy to create a simple theme in Google Chrome! Google’s Chrome Web Store offers a variety of themes for Chrome, which include background images for your new tab page and custom colors.
There is a official Google app which allows you to create a custom Google theme quickly and easily!
You can even share the themes you create.

Getting Started

First grab the My Chrome Theme app from Google.install it from the Chrome Web Store. It will appear on your new tab page, where your other installed Chrome apps do.


Choosing an Image

You can either upload an image file or capture an image from your webcam.choose an image and you can check how it looks like when it applied!


You can upload your own creation or a graphic or a photo or any one from another source.and you can add effects and resize the image and some editing through the App


Adding Colors

On the next screen, you’ll be able to choose separate colors for the frame, toolbar, and background color. Of course, this is a Google app, so there’s an “I’m feeling lucky” button that will automatically select some appropriate-looking colors for you. The automatically selected colors will attempt to match the background image you selected earlier.


Installing and sharing Your Theme

After you finished you will have an option to install your theme to your browser and share it with your friends!for sharing you'll get a link and you can share it with your friends through Google+, Facebook or using any other media you like!


rkarunarathna Web Developer,Programer

Roshan is an undergarduate student in Information and Communication Technologies from Vavuniya Campus of the University of Jaffna.He is very much interesting on IT related Topics and the technical stuffs.Roshan is also a creative mind with lots of ideas and potential writter..!

Friday, January 2, 2015

Firefox theme එකක් ලේසියෙන් හදමුද?


මේක හරිම easy වැඩක්! අපි කරන්න හදන්නේ අපේම පින්තූරයක් භාවිතා කරලා Firefox themes හදන එක.මේක පුංචිම දෙයක් ඇත්තටම ලස්සනට ගොඩක් මහන්සිවෙලා මේ වැඩේ කරන්නත් පුලුවන් අද අපි පුංචිම තැනින් පටන් ගමු.Firefox themes එහෙම නැතිනම් “personas” වලට පුලුවන් ඔයාගේ browser එක ඔයාටම ඕන විදිහට වෙනස් කරන්න.
හරි වැඩේට යමු.Chrome වල මේ වැඩේ කරන්න කැමති අය මෙතනට යන්න.. Chrome theme එකක් ලේසියෙන් හදමුද?

ඉමේජ් එක සකසා ගැනීම

සරලම ෆයර් ෆොක්ස් theme එකේ images දෙකක් තියෙනවා.අපි කියමුකෝ ප්‍රධාන රූපය එහෙම නැතිනම්  header image එක තමා උඩ කොටස ආවරණය කරන්නේ.ඊලගට footer image එක පහල කොටසට නමුත් අලුත් ෆයර් ෆොක්ස් සංස්කරණ වල මෙම කොටස එච්චර භාවිතයක් නැති නිසා මේ රූපය අවශ්‍යම නෑ.
මේ විදිහට හදපු themes බලන්න මෙතනින්.
මුලින්ම ඔයා කැමති ලස්සන රූපයක්  දෙකක් හොයාගන්න පොඩ්ඩක් හිතල මේ තේරීම කරගන්න.මොසිල්ලා නම් කියන්නේ “Subtle, soft contrast images and gradients work best; highly detailed images will compete with the browser UI.” කියලා.මේකයි අපි මේ රූපය යොදන තැන ගැන හිතන්න ගොඩක්ම අපේ බ්‍රවුසර් එකේ දකුණු පැත්තනේ හිස් ඒ කියන්නේ රූපයේ ගොඩක් දකුණු පැත්තට ලස්සනට තිබ්බොත් නියමයිනේ.මේකට ඔයා යොදා ගන්න රූප දෙකට පහත අවශ්‍යතා තියෙන්න ඕන.

  • Header Image: 3000 pixels wide x 200 pixels tall, PNG or JPG format, 300 KB maximum file size
  • Footer Image: 3000 pixels wide x 100 pixels tall, PNG or JPG format, 300 KB maximum file size
ඔයාට පුලුවන් ‍මේ අවශ්‍යතා වලට ගැලපෙන රූපයක් යොදාගන්න එහෙම නැතිනම් ඔයාම එකක් නිර්මාණය කරලා යොදාගන්න දැන් ගොඩක් මෘදුකාංග තියනවා ඔයාට මේ සඳහා පාවිච්චි කරන්න පුලුවන්!ඔයාට පුලුවනි ඔන නම් රූපයක් තොරාගෙන අදාල මිනුම් වලට crop කරගන්නත්!


හදපු theme එක කොහොමද බලමු..

මේකට ඉතාම පහසු ක්‍රමයක් තියෙනවා.ඔයාට මේ සඳහා පොඩි එක්ස්ටෙන්ෂන් එකක් භාගත කරගන්න වෙනවා ඔයාගේ බ්‍රවුසර් එකට! මේක official extension එකක්!( Personas Plus extension.) දැන් browser එක restart කරන්න දැන් ඔයාට පෙනේවි ඔයාගේ toolbar එකේ දකුණු පැත්තේ පොඩි icon එකක්( පොඩි නරියෙක් ඔන්න! :p ) ඒක click කරල Preferences තොරන්න. “Enable custom personas” check box එක තෝරලා OK කරන්න.


ඊට පස්සේ  icon එක click කරලා custom Persona තොරලා Edit click කරන්න.දැන් ඔයාට වින්ඩෝ එකක් දකින්න පුලුවන් වෙයි ඔයාගේ theme එකට අදාල රූප, පාට,නමක් තෝරන්න තියෙන! ඉතින් මෙතනින් අදාල දේවල් තෝරන කොට ඔයාගේ browser එක වෙනස් වෙලා අදාල වෙනස් කම පෙන්නාවි.දැන් ok කලාම මේ theme එක ඔයාගේ browser එකට apply වෙනවා.
.

මේ theme ඕනෑම මෙහෙයුම් පද්ධතියක වැඩකරනවා.(Firefox on Windows, Linux, or Mac OS X.)

අපේ Theme එක ලොකේටම දෙමුද?

මේ වැඩේ හරිම ලෙසියි! ඔයා හදපු theme එක හැමෝටම පාවිච්චි කරන්න දෙන්න ඔයා කැමතිනම් කරන්න තියෙන්නේ එක Mozilla add-ons gallery website එකට ඇතුල් කරන එක.මේ සඳහා ඔයාට developer account එකක් ඕන.මේක නොමිලේ හදන්න පුලුවන්!ඔයා මේකට theme එක ඇතුලත් කරාම ලොකයේ Mozilla පාවිච්චි කරන හැමොටම කැමතිනම් ඔයාගෙ theme එක පාවිච්චි කරලා බලන්න පුලුවනි.rate කරන්න පුලුවනි  Mozilla add-ons gallery website එක හරහා.මේ සඳහා මේ සබැඳියෙන් යන්න.
rkarunarathna Web Developer,Programer

Roshan is an undergarduate student in Information and Communication Technologies from Vavuniya Campus of the University of Jaffna.He is very much interesting on IT related Topics and the technical stuffs.Roshan is also a creative mind with lots of ideas and potential writter..!

How To Create a Simple Theme for your Firefox Browser..


Its easy to create Firefox themes by adding your own images.If you capable enough there are very advance theme making tools also.Firefox themes — also known as “personas” — can change the way your browser looks, making it more personal.
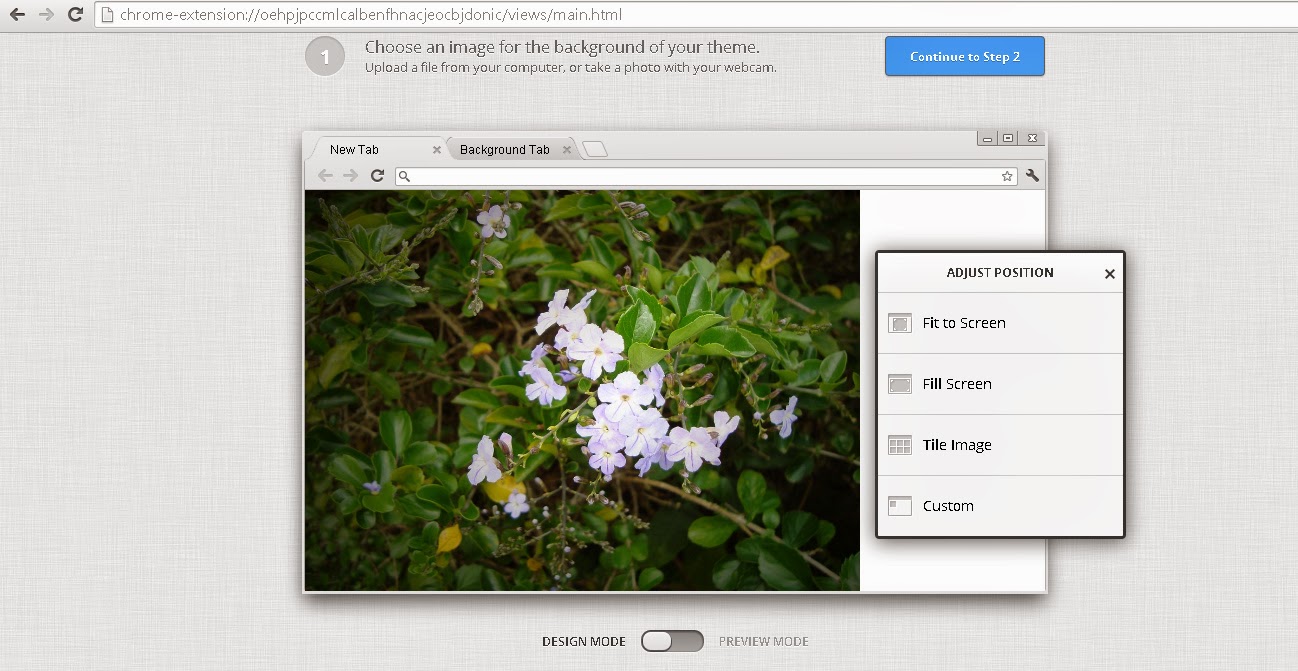
This isn’t too hard — all you need to do is find a background image or two and crop them to the correct proportions. Chrome users can check How to create simple themes for your Chrome Browser...

Get Your Images Ready

A simple firefox theme consists two images.The header image is behind everything at the top of the Firefox window, and the footer image is behind the Find and add-on bars at the bottom of the window. The latest versions of Firefox remove the add-ons bar unless you install an extension to bring it back, so the top image is much more important. You’ll only see the bottom image when you press Ctrl+F to use the Find toolbar.
You can find pre-made firefox themes from here.
First, choose a nice image that will work well on your top toolbar. Mozilla advises that “Subtle, soft contrast images and gradients work best; highly detailed images will compete with the browser UI.” the top right is the most visible part so its better to choose an image considering that fact. As you resize the browser window, more of the left side of the image will become visible.
These are the Sizes of the images you need

  • Header Image: 3000 pixels wide x 200 pixels tall, PNG or JPG format, 300 KB maximum file size
  • Footer Image: 3000 pixels wide x 100 pixels tall, PNG or JPG format, 300 KB maximum file size
Its better to find an image which suffice those requirements.BTW why not try your skills and do some Photoshop to create the image :). Anyway its up to you to design it!Or get a normal image and crop it using PhotoshopPixlr or any other software according to requirements mentioned!

You’d then crop your image — select Image > Crop in Pixlr — and you’d end up with a correctly sized image. You can now save it to your computer (File > Save in Pixlr). Repeat this process if you want a footer image, but make sure it’s only 3000×100 instead of 3000×200.

Enable and Configure Your Custom Theme

There is a way to test your theme without installing it!.To create a custom theme without submitting it to the Mozilla themes website, install Mozilla’s official Personas Plus extension. Restart your browser after installing it, click the Personas Plus icon on your toolbar, and select Preferences. Activate the “Enable custom personas” check box and click OK.


Now click on Personas Plus icon on the toolbar and go to custom Persona and click Edit.You'll get a window with an interface to add your images and select text colors.You will notice that when you add the image you'll be able to see it automatically appear on your browser.So browse for the header image file you created earlier and it will automatically appear on your Firefox toolbar.
Note that the footer image is optional — you’ll really only see if when you use the Find bar these days. If you don’t select a Footer image, the Find bar will just look like a normal part of the interface without any themes. Most people will probably be happy with that.
Select appropriate text and accent colors to make the browser’s toolbar text and icons stand out.

The resulting theme will work on every operating system, whether you’re using Firefox on Windows, Linux, or Mac OS X.

Showing  your  Theme to the world!

You can easily do this from Mozilla add-ons gallery website.All you need is a developer account its easy to create.So other people will be able to browse, install, and rate your theme on the Mozilla add-ons gallery website, use the Submit a New Theme page on Mozilla’s website.
rkarunarathna Web Developer,Programer

Roshan is an undergarduate student in Information and Communication Technologies from Vavuniya Campus of the University of Jaffna.He is very much interesting on IT related Topics and the technical stuffs.Roshan is also a creative mind with lots of ideas and potential writter..!